‘Tis the season for crafts, including learning how to make paper snowflakes. The best part is, you only need a good pair of scissors and paper. Your paper options are endless — wrapping paper, copy paper, colored cardstock, or tissue paper.
With your new cutting skills, display them on your windows, around your holiday tree, attach to presents, or give them as gifts. Making paper snowflakes is also a genius craft idea to keep kiddos still and occupied.
To make this process simpler, we created six step-by-step images for how to fold the paper, as well as three ideas for how to cut different snowflakes (illustrated as before-and-after images).
As long as you’re feeling crafty, check out our list of DIY Christmas ornaments and easy Elf on the Shelf ideas. Or look around our dedicated Christmas Deals and Coupons page for discounts on indoor and outdoor decor, gifts, and more.
Try these easy paper snowflake templates before the holiday season or any time during the winter. Plus, download The Krazy Coupon Lady app or text HACKS to 57299 to get all kinds of money-saving tips and tricks sent straight to your phone.
How to Make Easy Paper Snowflakes

You don’t need to be an expert crafter to make a stellar snowflake. These whimsical decorations can be soothing to make and act as a great indoor activity for all ages.
Paper Snowflakes
Step 1: Start with a 8.5″ x 11″ piece of paper.

It’s easiest to just purchase paper in the standard 8.5″ x 11″ size rather than cut your own. Use a ruler if you have bigger paper that needs to be resized.
Related: FREE Bingo Cards
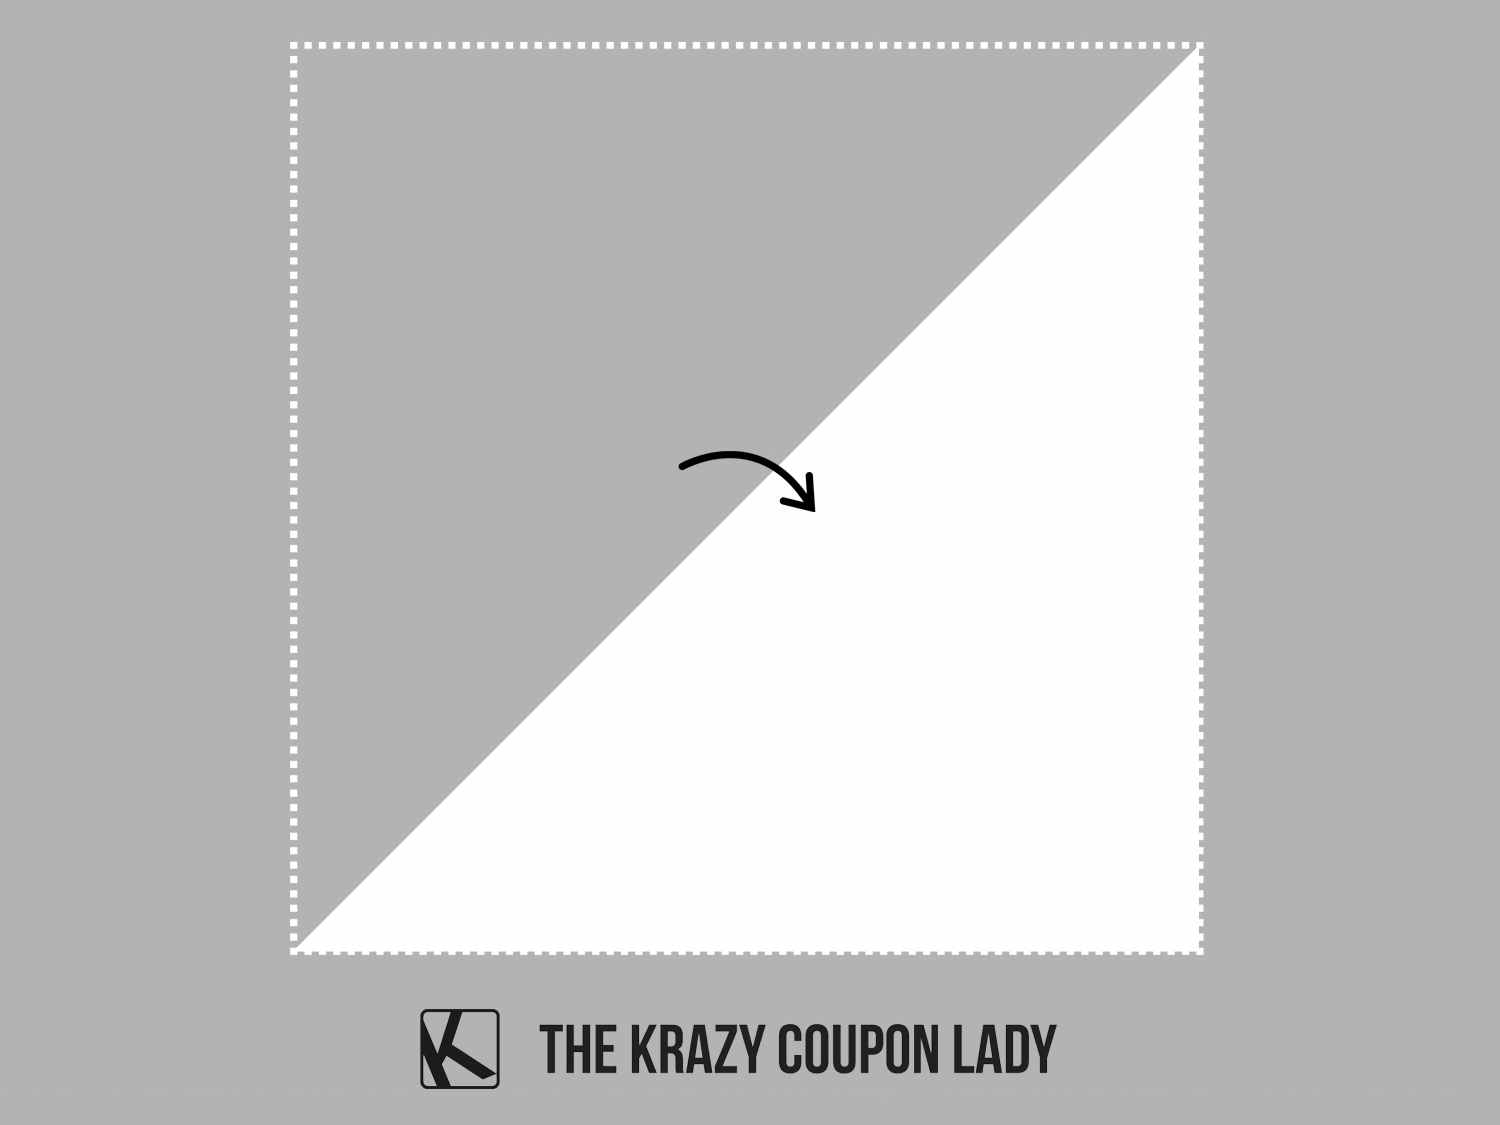
Step 2: Fold the paper into a right-angled triangle.
With your standard paper size, fold the paper diagonally so that it creates a triangle. Fold from the upper left to lower right.
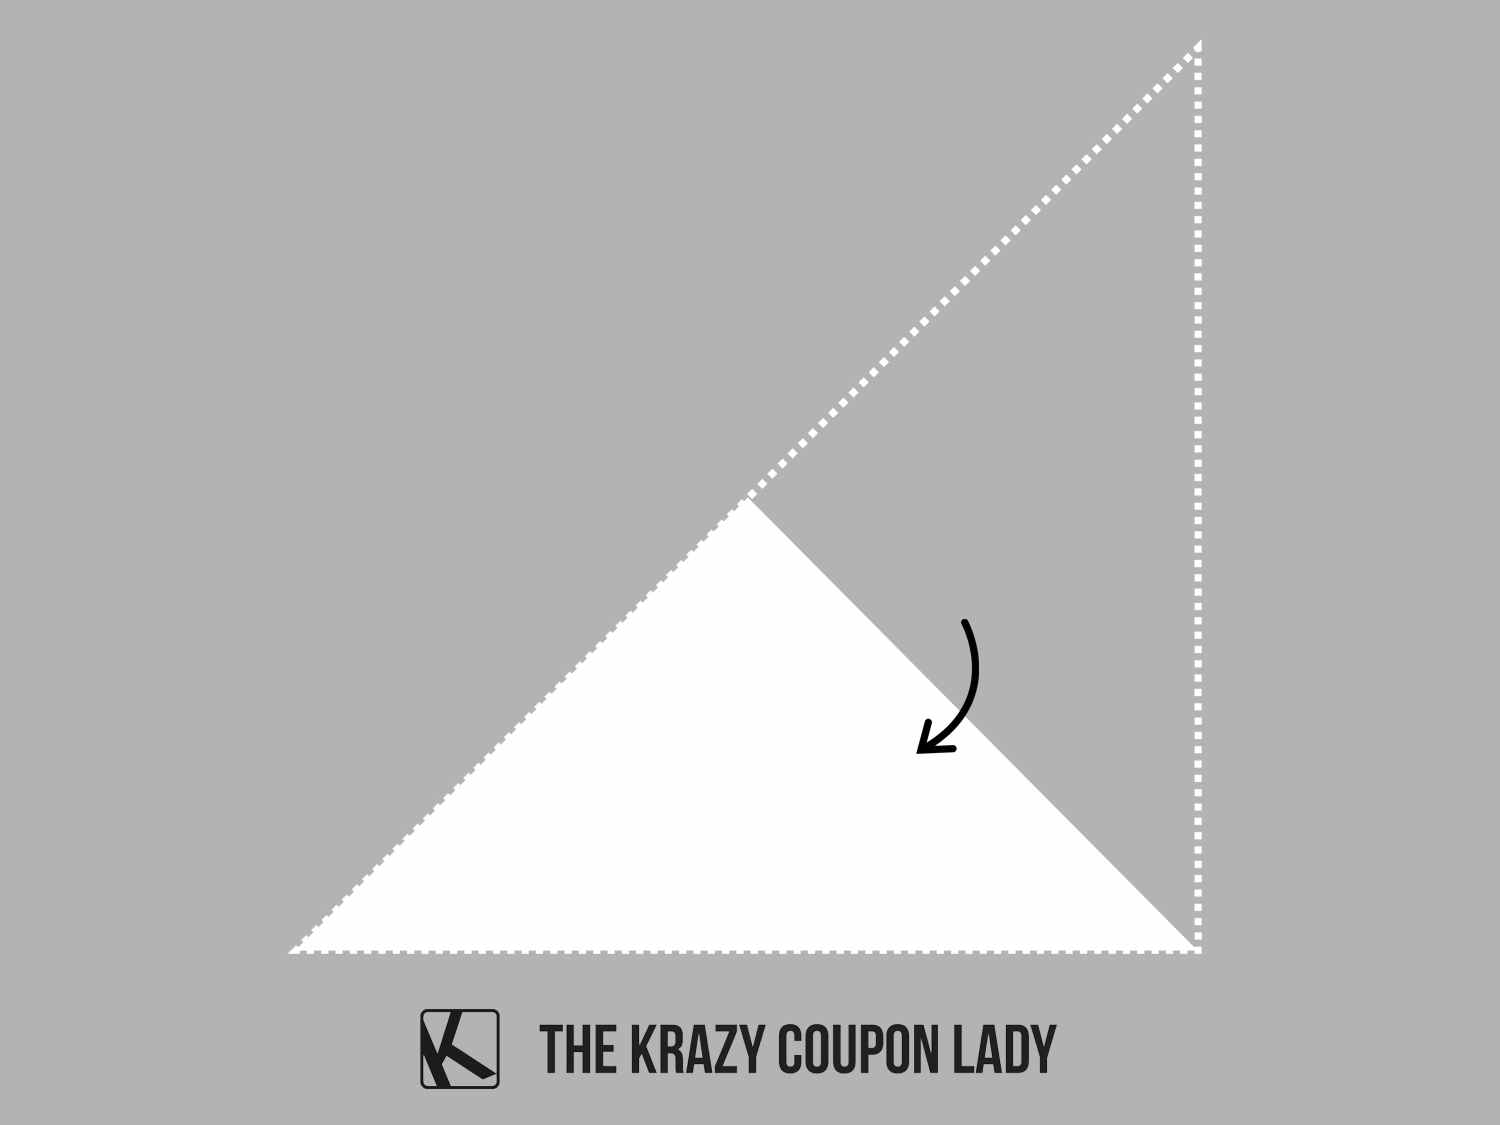
Step 3: Make another diagonal fold triangle.
Create another smaller triangle by folding the first triangle in half. Be sure to fold evenly so that the corners meet.
Step 4: Fold your triangle into thirds, starting with the right side.
With your small triangle created, fold the paper into thirds. Start by bringing the right pointed corner towards the left.
Related: 27 Michaels Store Hacks To Save Money
Step 5: Finish making the third fold.
Next, fold the left pointed corner to the center. Crease the folds once the thirds have been perfected.
Step 6: Cut the pointed ends.
With your paper snowflake folded into thirds, trim the pointed ends so that you have a small triangle again. Now that you’ve mastered the basic shape, try these templates for more detailed looks.
Paper Snowflake Pattern 1: Simple Snowflake Template
There are lots of paper snowflake templates, but this one is pretty elementary. Follow the cut pattern above for this snowflake pattern and unfold gently to reveal the beautiful details.
Paper Snowflake Pattern 2: Holiday Ornament Template
Call it a holiday ornament or light bulbs, this paper snowflake ornament pattern is less complex in terms of cuts. Hang it on your tree when you’re done.
Paper Snowflake Pattern 3: Star Template
This star snowflake template is a bit more detailed, but the result is a beautiful display of intricate patterns.

















Tell us what you think